If you don’t use Zoom yourself, you’ve probably been on countless presentations that use it.
The problem with Zoom is if you’ve seen one … you’ve seen them all.
Sure you could use 3rd party tools like eCamm Live or Prezi to add some pizazz – if you can brave the learning curve.
I’ve recently discovered a very cool capability right inside of Zoom. That you can add in minutes to spice up your presentations.
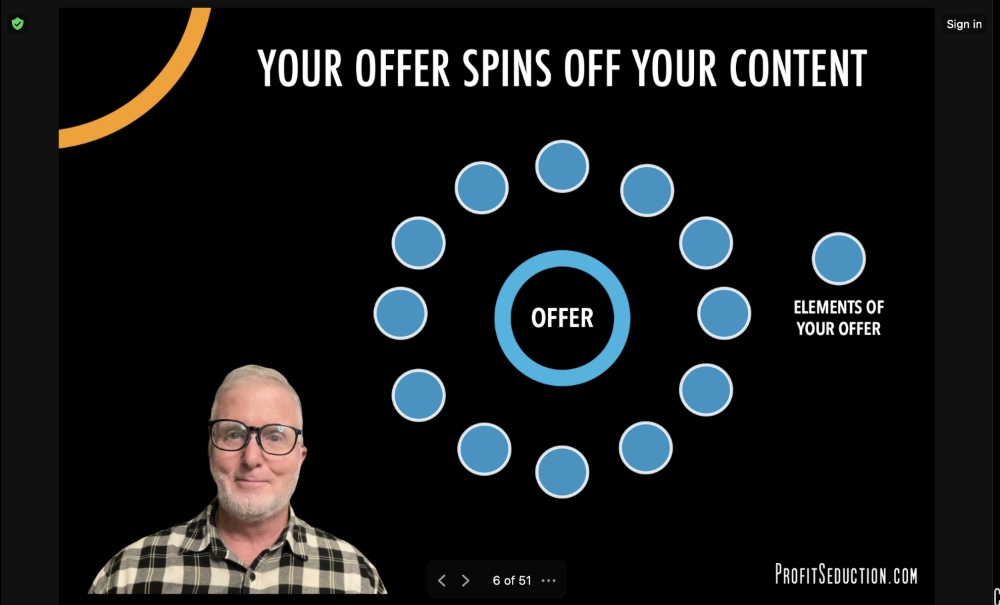
It’s a way to add “picture-in-a-picture” to your slides in either PowerPoint or Keynote (Mac) format. Meaning instead of your face appearing in a tiny box above or the right of your slides.
You can superimpose the live video of your face right above the slides themselves.
It’s a really cool, cohesive, engaging effect that skyrockets novelty and engagement. And more importantly, can keep your viewers viewing longer.
Which can increase your response and sales!
Ready to try it out for yourself? Super! I’ve included a video as well as step-by-steps with screen grabs to walk you through.
You can even use it for your very next presentation!
Here’s the video demo:
Here’s the step-by-step walkthrough:
STEP

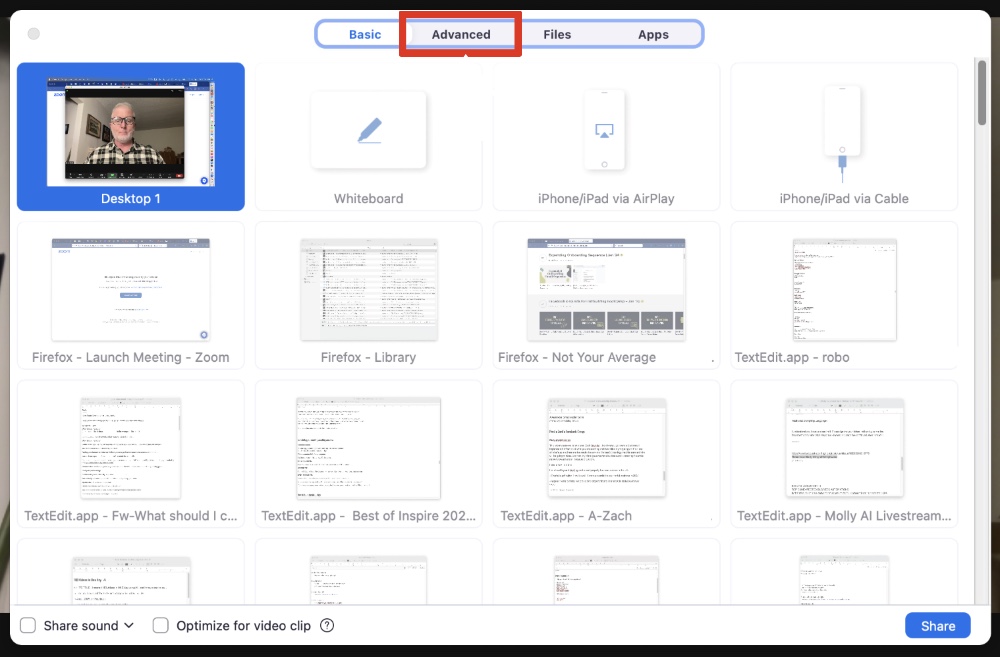
Click the “Share Screen” button like you normally would if you were going to share the screen.
But instead of choosing your slide presentation window to share, click the Advanced tab at the top of the screen instead.
STEP

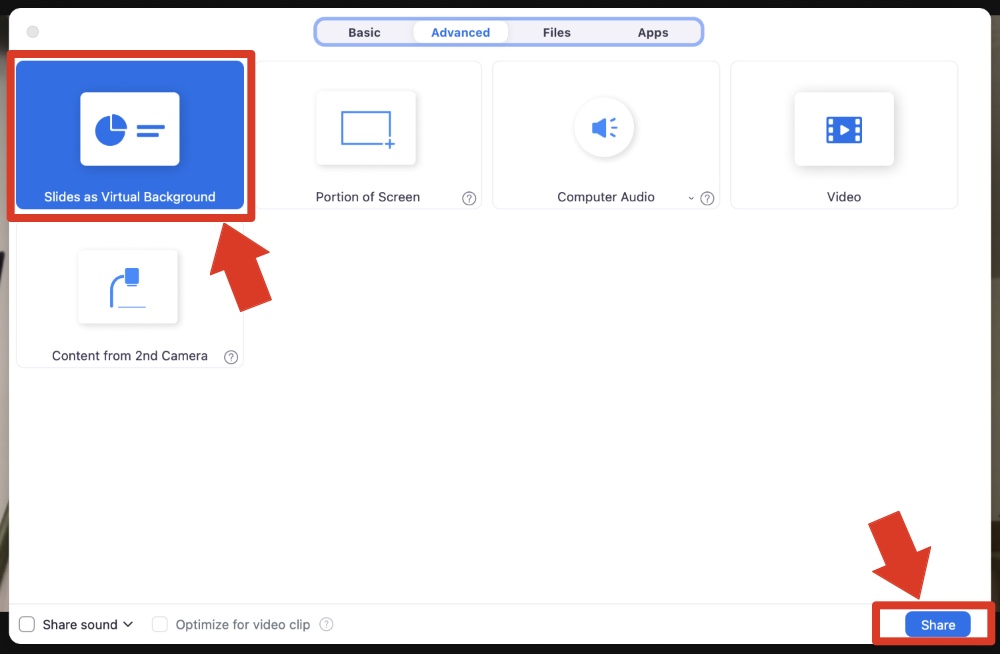
Once you’ve clicked on the Advanced tab, you will select the Slides as Virtual Background option and then click the Share button in the lower right of the screen.
STEP

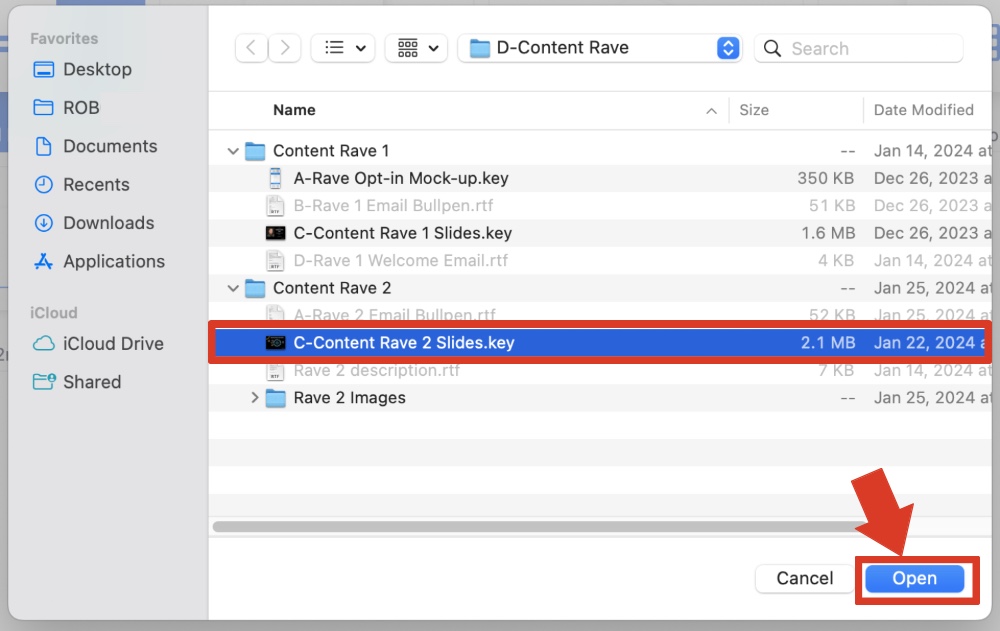
Now navigate to the place on your hard drive where the slide deck you want to share is found. Click the slide file, and then click the Open button.
IMPORTANT: The slides you share must either be Keynote (Mac) or PowerPoint format in order for the effect to work.
STEP

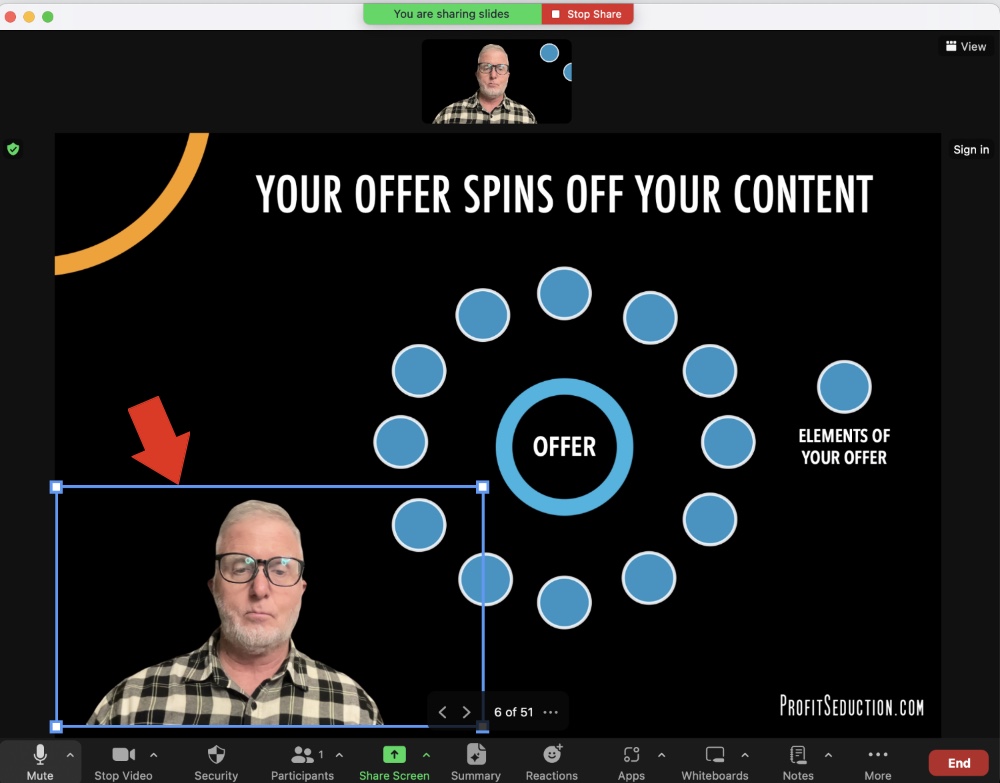
After a few seconds the slide deck will load onto your screen. There will be a slight delay and then a small video image of you will appear over the slides, usually in the lower right-hand corner.
Zoom will automatically remove the background of the video, so it appears as if you are floating on top of your slide deck. No green screen required!
Click on the video image and drag it to the position you want. Then to resize the video of your face, click on the white boxes on the corners of the blue bounding box around the video image.
Make sure your camera is on to take advantage of the effect.
STEP

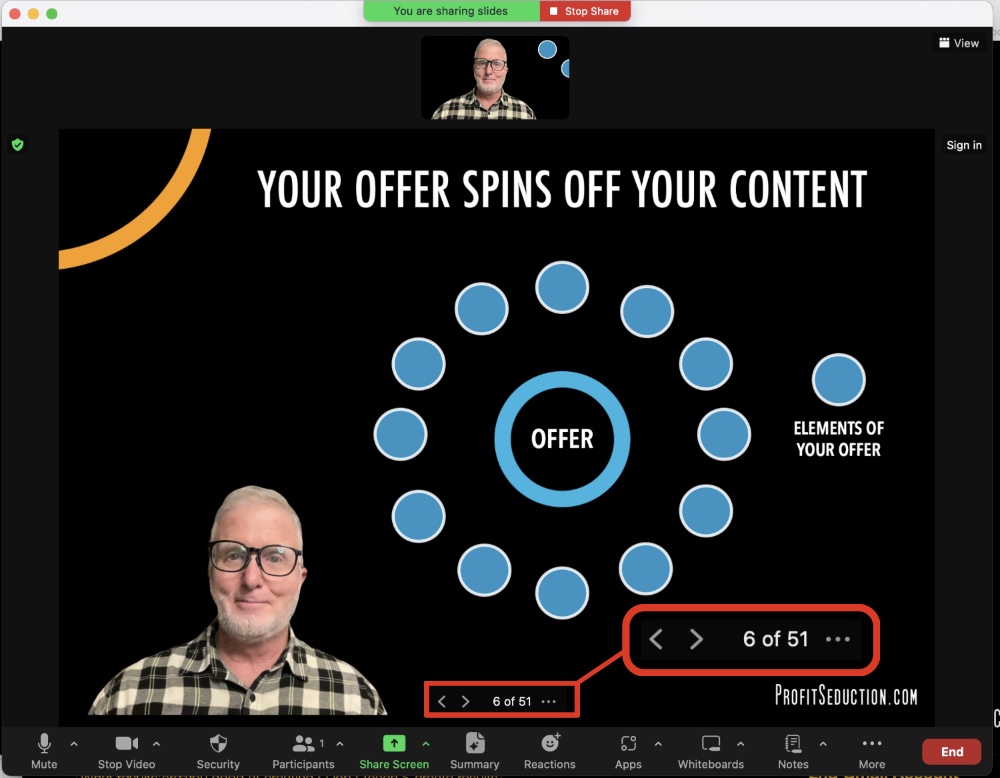
Click anywhere outside the blue bounding box to make it disappear and Boom! The video of you talking and presenting is magically superimposed over your slides.
You can advance your slides forward or backward by clicking the forward or backward arrows at the bottom of your screen. The number that appears on the left is the number of the slide you are on.
Sometimes things that can make you stand out online are hiding inside tools you already use.
You just have to know where to look for them.
I stumbled on this cool trick while I was searching for something else. Game changers don’t always come roaring through the front door, but sneak through the back door.
Let me know how you’re going to use this to spice up your own presentations!
Now that you have an unfair advantage with your presentations, wouldn’t it be great to find top tier clients for your top tier offers?
It doesn’t have to be an impossible dream. But it doesn’t happen by accident. You have to be intentional in seeking out top-tier clients for your top-tier work.
If you’re wondering exactly how to do that, I can help. With 21 specific suggestions that can make your high end client search a whole lot easier. Take a look!

Rob, you are brilliant! Thank you for sharing such valuable information. I appreciate you!
Thank you Andrea. Was pretty wild when I stumbled on this. Couldn’t believe it was hiding inside Zoom all the time …